

Scheduled Crawls.
How to run a scheduled crawl with Screaming Frog.
How to schedule SEO Spider crawls with the Scheduling feature: frequency, crawl profile, API integrations and automatic exports to a local folder or Google Drive.
The Scheduling feature
Once you understand the potential of the “Scheduling” feature, all that’s left is to configure it by following the steps below.
Schedule the crawl
You create a scheduled crawl from 1File›2Scheduling (shortcut ⌘T on Mac).
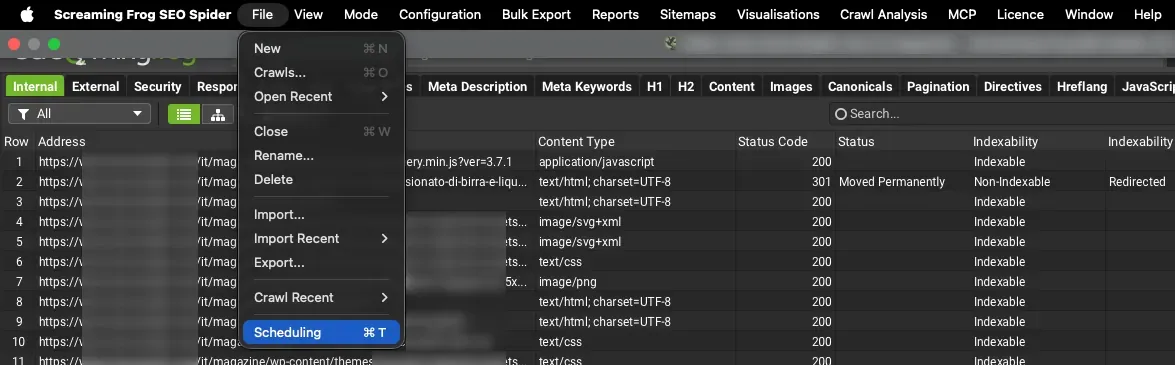
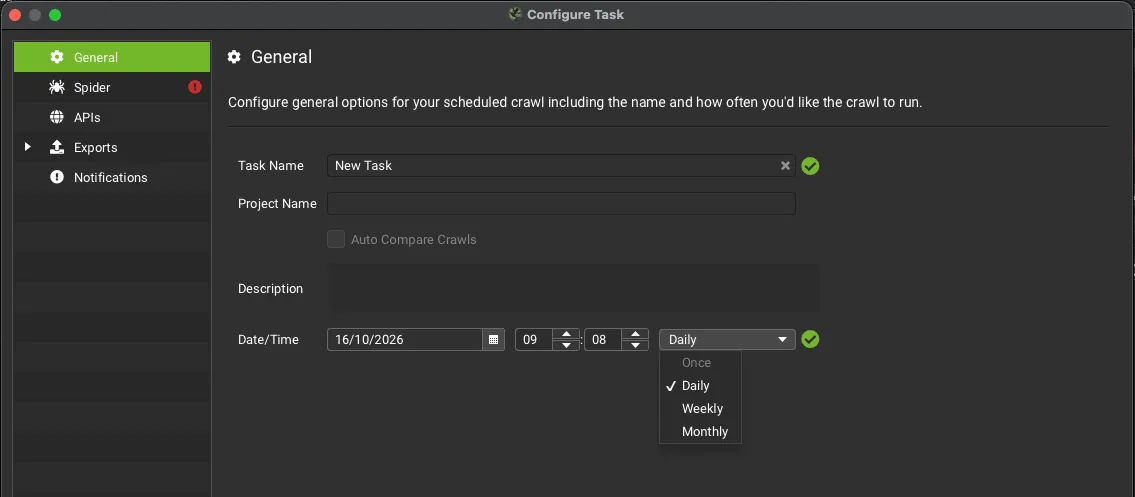
Click Add to create a new task. In the General tab you can set some general aspects of the crawl:
- Task Name: a descriptive name for the crawl.
- Project Name: the project the crawl belongs to.
- Description: very useful to describe in words all the specifics and options of the crawl.
- Date/Time: the date and time of the crawl and how often it runs (once, daily, weekly or monthly).
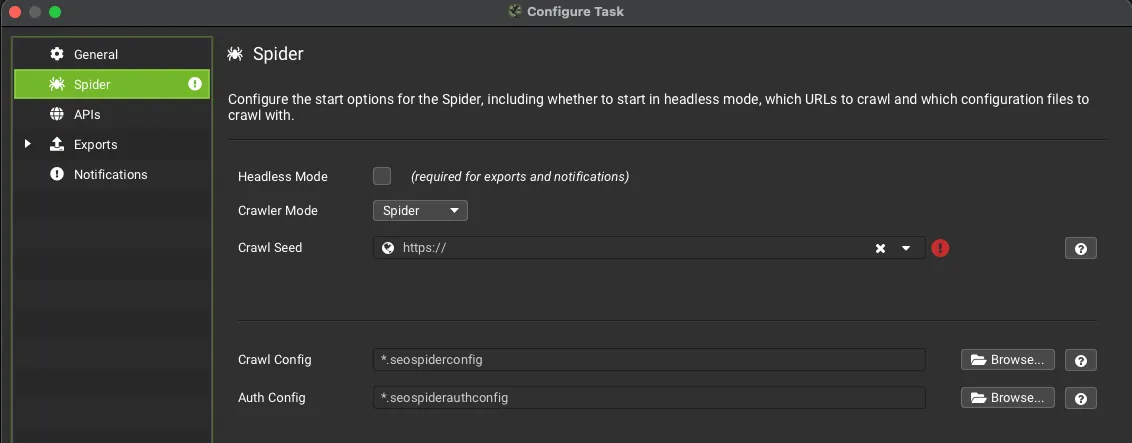
SEO Spider configuration
In the second tab, Spider, you can choose between Spider and List crawl mode, enter the root domain or subdomain in the Crawl Seed field and choose which configuration to apply by loading a saved configuration file (if you have one).
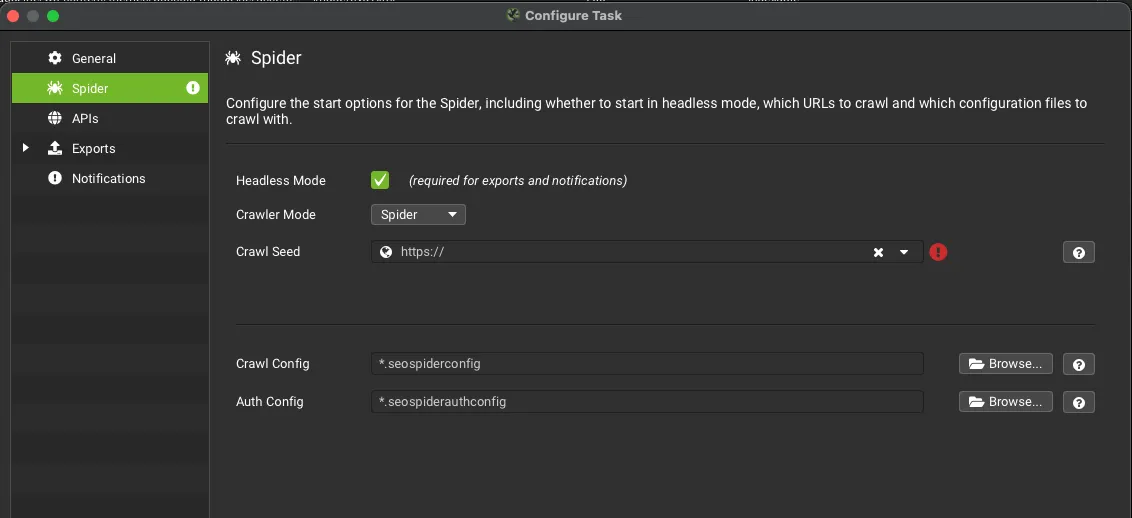
The Spider tab also has the Headless Mode option: the crawl runs without the interface, to avoid unwanted user interaction, and it’s required if you want to export data or receive notifications.
APIs
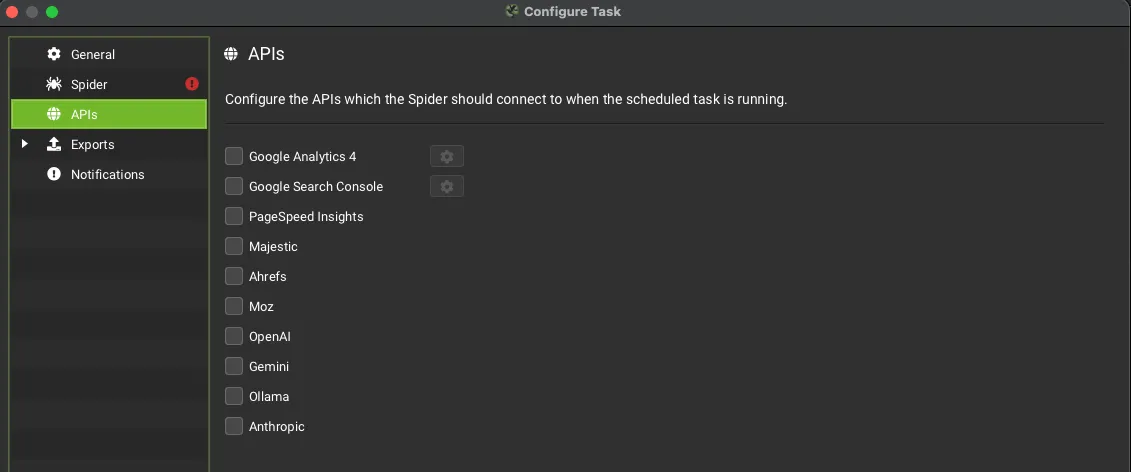
In the APIs tab you can enrich the crawl with data from Google Analytics 4, Search Console and PageSpeed Insights, link metrics from Majestic, Ahrefs and Moz, and the AI model APIs (OpenAI, Gemini, Ollama and Anthropic) for a more granular view of the project.
Saving the data
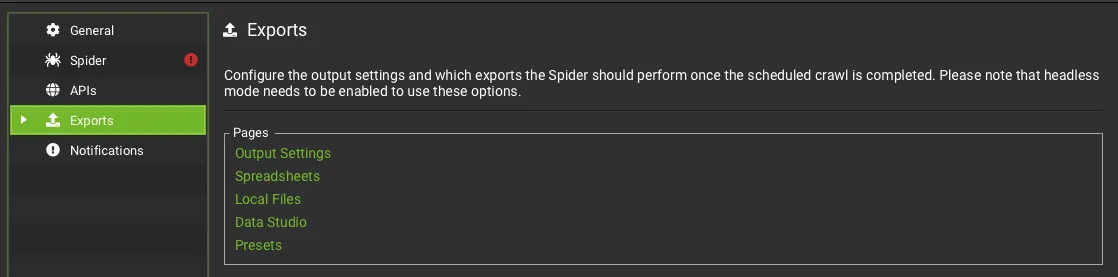
In the Exports tab you can define the tabs, “Bulk Exports” and reports you want to export. The tab is split into the Output Settings, Spreadsheets, Local Files, Data Studio and Presets pages. Remember that exports only work with Headless Mode on.
In Output Settings you choose the local folder, the Google Drive account and the file format. Data is delivered as “.csv” (or other formats such as xlsx) and saved locally, or as “gsheet”: with this second option you’ll find the exported documents in the “Screaming Frog SEO Spider” folder on Google Drive (you’ll need to have connected your Google account).
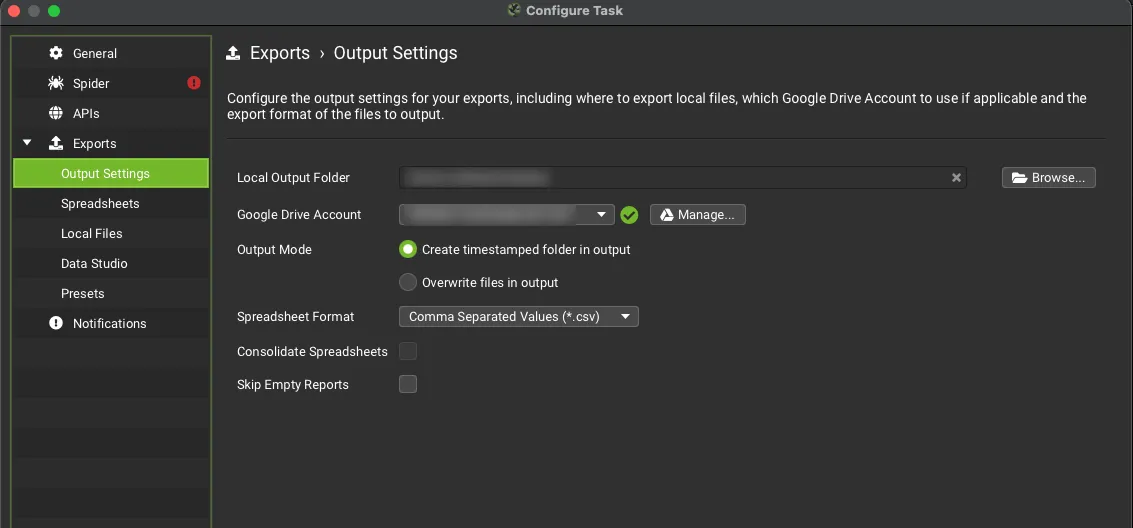
Another very handy “Scheduling” option for recurring crawls is Output Mode: you can choose whether, at the end of each scheduled crawl, to automatically overwrite the original files so only the latest crawl is kept, or to create a “timestamped” folder that adds the new documents and keeps a history of your crawls.
On the Spreadsheets page you choose which tabs, Bulk Exports and reports to export: you can download just one specific tab (e.g. “Internal”, “Meta Description” or “H1”) or combine several tabs and reports.
Note: if you use “Database Storage” mode, the scheduled crawl is always available to reopen later.
If several scheduled crawls overlap, Screaming Frog runs them at the same time. This needs more system resources, so crawls may take longer and your computer may slow down.
Further readingAutomated crawl audits with Data Studio.From scheduled crawl to automatic report: Crawl Overview export to Google Sheets and the Data Studio template.Read the guideVideo tutorial (in Italian)
Questions about Scheduled Crawls?
These guides come from real projects. If something in your crawl doesn’t add up, or you want to apply this process to your site, get in touch.
 Author.Raffaele Visintin.Search & Strategic Marketing Advisor
