

SEO Migration.
Learn how to run a flawless migration with Screaming Frog without losing search engine rankings.
How to use SEO Spider at every stage of a migration so you don’t lose rankings: a backup crawl before the switch, staging vs live comparison, redirect checks and tracking checks.
How to migrate a website
This article shows you the best way to find and fix the most common issues during the delicate migration phase.
Every migration is an epic undertaking: the goal is not to hurt the organic ranking of the site you’re migrating.
Pre-migration
Before diving into the process, there are some essential pre-migration steps where a crawler can help, and they shouldn’t be overlooked.
Crawl the current site
First, I recommend a full crawl of the website to:
- compare it with the staging site;
- check that old URLs have been correctly redirected to the new resources;
- have a backup to fall back on if something goes wrong during the migration.
In short, before the migration you need a complete backup of all the most important elements of the current site.
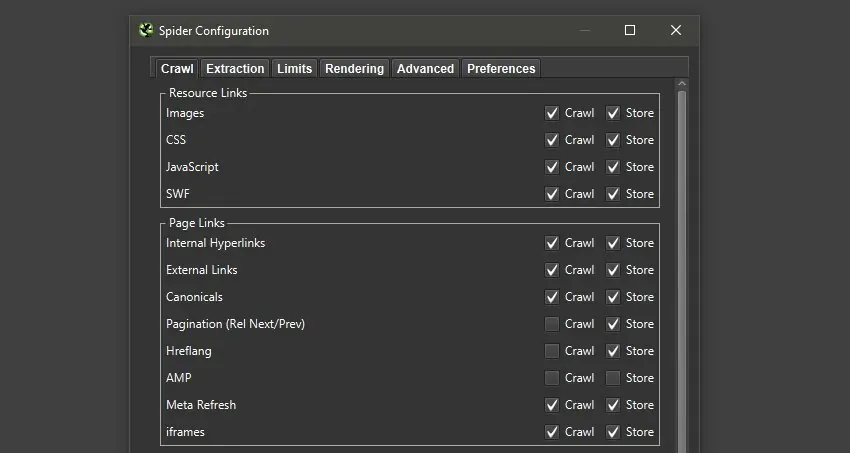
To use Screaming Frog at this stage, enable crawling of every resource you may need to refer to later, such as AMP versions, hreflang and structured data.
On this shopping list, don’t forget client-side JavaScript dependencies that need rendering, and include every other domain, subdomain or mobile and desktop variant of the site.
Always include the XML sitemap in the crawl and connect Google Analytics and Search Console via API to find any orphan pages (enable Crawl New URLs Discovered in GA/GSC).
Also collect link data from Ahrefs, Majestic and Moz and query performance from GSC, to keep an eye on the pages that matter for revenue, conversions, traffic, impressions and clicks and not lose the rankings you’ve earned.
Export the URLs to redirect
During migrations the elements that change most often are slugs, so you need a complete list of URLs to permanently redirect old pages to their equivalents on the new site.
This is relatively simple in a domain migration with unchanged paths, but it becomes complex and risky if the whole URL structure changes or some strategic areas are rethought around new search intents.
To get the complete list of existing URLs, export them from the live site crawl with Export in the Internal tab.
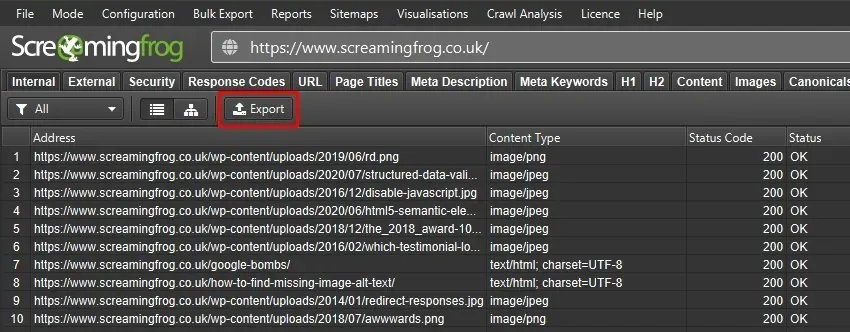
This mapping is one of the crucial stages of the migration, to redirect every element in the most appropriate way. If full mapping isn’t possible, prioritise the top-performing pages based on the conversions, users and links collected in the previous step.
Pre-migration testing
When the new site is on staging, it’s time for pre-launch checks, and here too the crawler helps: the first task is to crawl the staging site to find differences, problems and opportunities.
Sites at this stage are usually protected by robots.txt or a password so search engines don’t crawl them. With Screaming Frog you can authenticate, ignore robots.txt or crawl resources left in noindex or nofollow because they’re still in development.

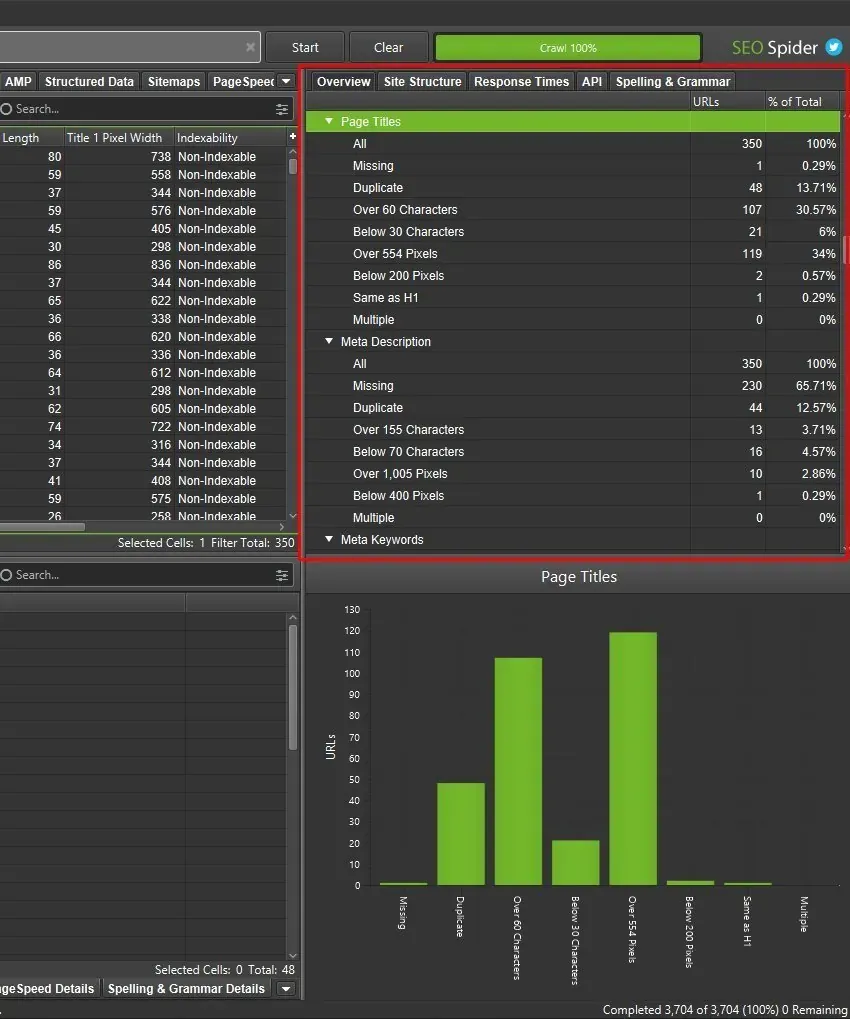
Once the staging crawl is complete, start your analysis from the Overview tab in the side panel.
Staging vs live site
URL Mapping
Now you have all the data you need: the crawl of the live site on one side and the staging crawl on the other. All that’s left is to compare the two versions to find any inconsistencies.
You can do this with Compare mode (1Mode›2Compare), choosing the two crawls to compare from the top bar.

URL Mapping lets you compare different URL structures, such as different hostnames or directories, using Regex rules.
Choose the two saved crawls and click the cog icon in the top bar (or 1Configuration›2Compare). In the Crawl Comparison Configuration window, open URL Mapping and map the old domain to the new one with a Regex.
In the example, the existing site was mapped to the staging version by hostname only, because they share the same URL paths.
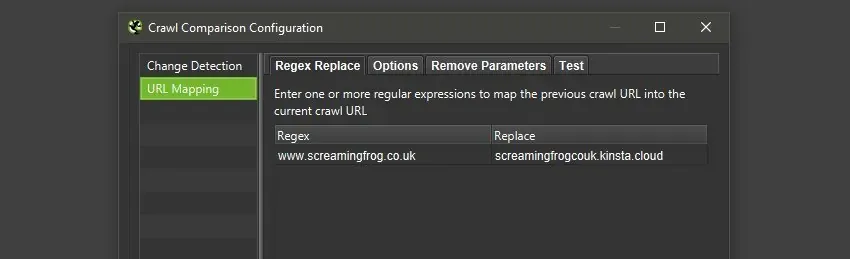
With the mapping in place, equivalent URLs are compared with each other in the Overview tab, issues and opportunities, site structure and change detection.
Once the comparison is done, click the columns to see which URLs changed, and use the main window filter to switch between the current and previous crawl to check URLs that were added, are missing, or have new or removed elements.
SEO Spider uses four columns to segment changed URLs:
- Added: URLs present in both crawls that have entered a filter in the current crawl. For example, taking the live site as “Current” and staging as “Previous”, for H1s this filter shows URLs with an optimised H1 only on the live site.
- New: URLs that don’t exist on the current site but have been introduced on the new site.
- Removed: URLs in the current crawl’s filter but not in the new staging site’s filter.
- Missing: URLs present in both crawls that differ at filter level. For example, on the live site (“Current”) a URL has no meta title, while on staging (“Previous”) it was optimised.
Change Detection
In a migration it’s good practice to keep changes that could affect the site’s visibility to a minimum.
To keep them under control, use Compare mode’s Change Detection, which shows every element that changed between the current site and staging.
To enable it, open 1Configuration›2Compare (or the cog icon at the top) and select the elements and metrics whose changes you want to examine.
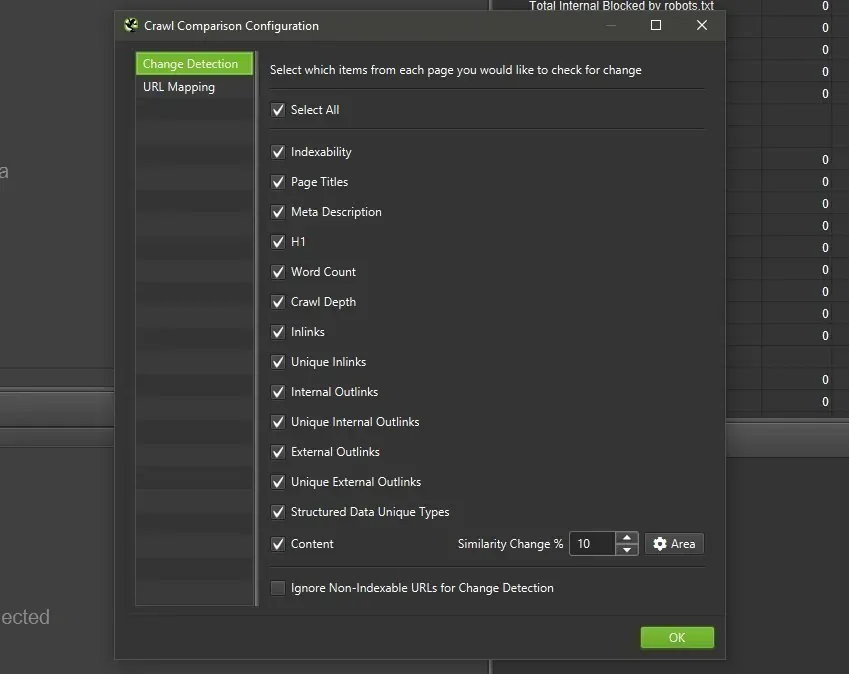
Then click Compare to run the comparison. The Change Detection tab, not shown by default, appears as the last tab in the side panel and the main window.
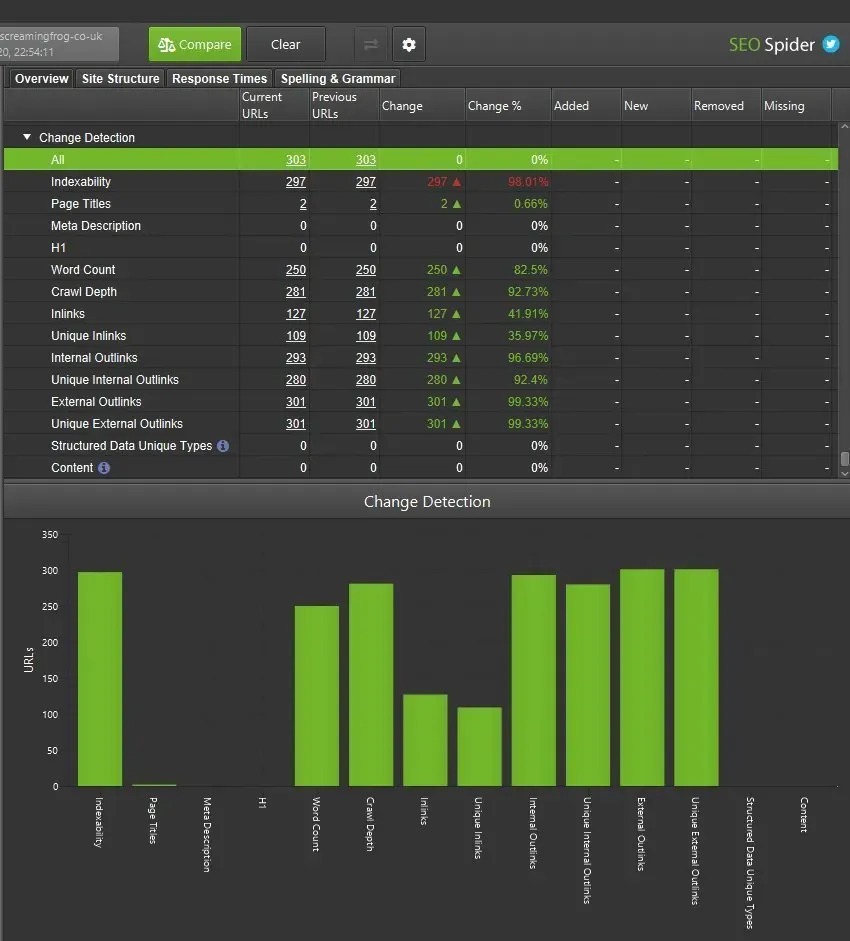
In the example, 2 URLs changed their title and 250 their word count, while meta descriptions and H1s stayed the same.
On this screen you can click each element to isolate it and see its changes. Below, page titles have been isolated to check their semantic validity.

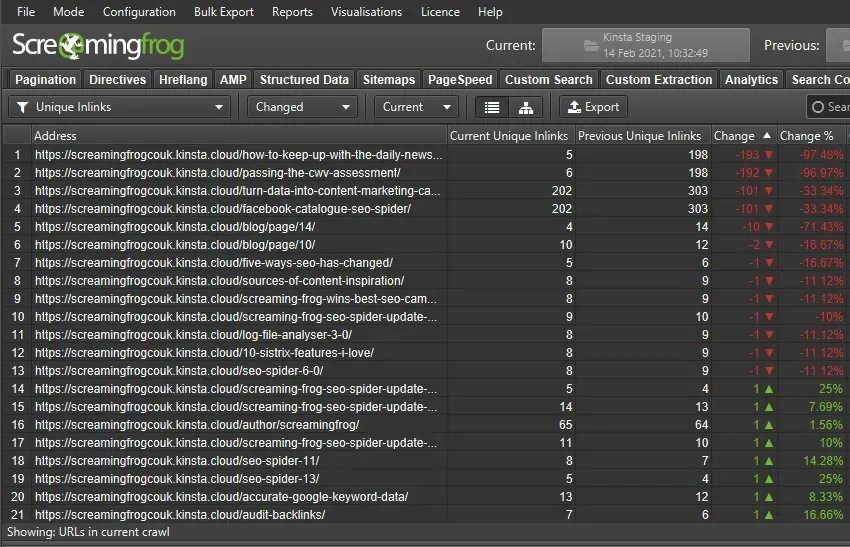
If the migration changes the site structure and internal links a lot, it’s essential to understand which pages lost or gained links and which changed crawl depth.
Redirect mapping (bonus)
Although it wasn’t designed for this, the Near Duplicates feature helps you map redirects from old URLs to new ones when the content is similar.
Switch to List mode (1Mode›2List), turn on Enable Near Duplicates and turn off Only Check Indexable Pages for Duplicates in:
1Configuration›2Content›3Duplicates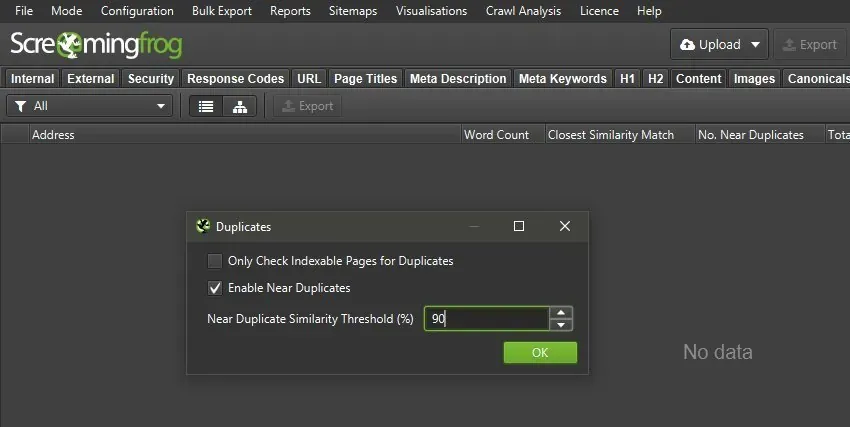
Then refine the crawl by configuring the content area used to calculate similarity between old and new URLs:
1Configuration›2Content›3AreaFor example, you can include the classes of the category and product descriptions on the old and new site, if they’ve changed. If the templates are the same, you’re unlikely to need to adjust the content area.
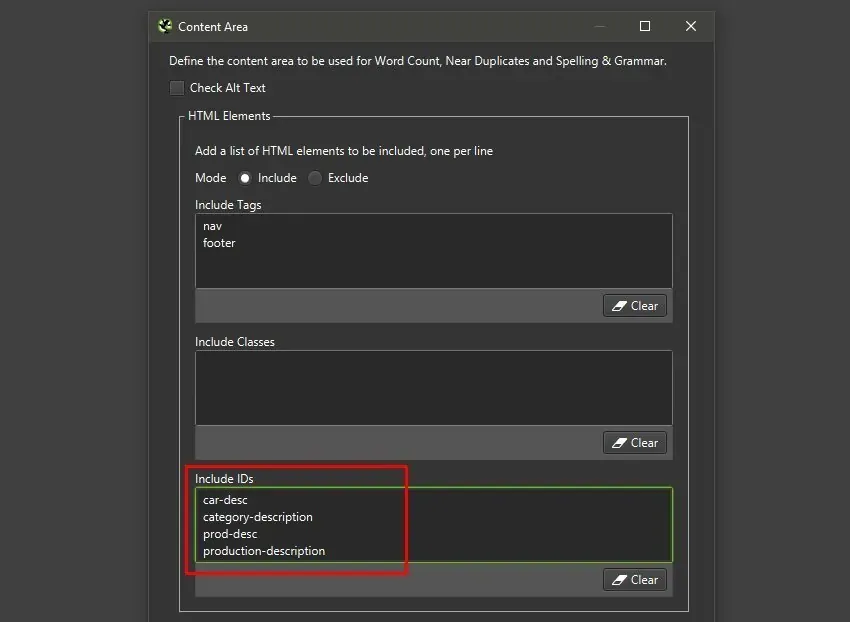
Upload both the old and new URLs in List mode and crawl them. Remember to remove the depth limit in 1Configuration›2Spider›3Limits and to include both the existing site’s home page and the staging home page.
When the crawl is done, run Crawl Analysis and open the Content tab to see the near duplicates and the similarity score.
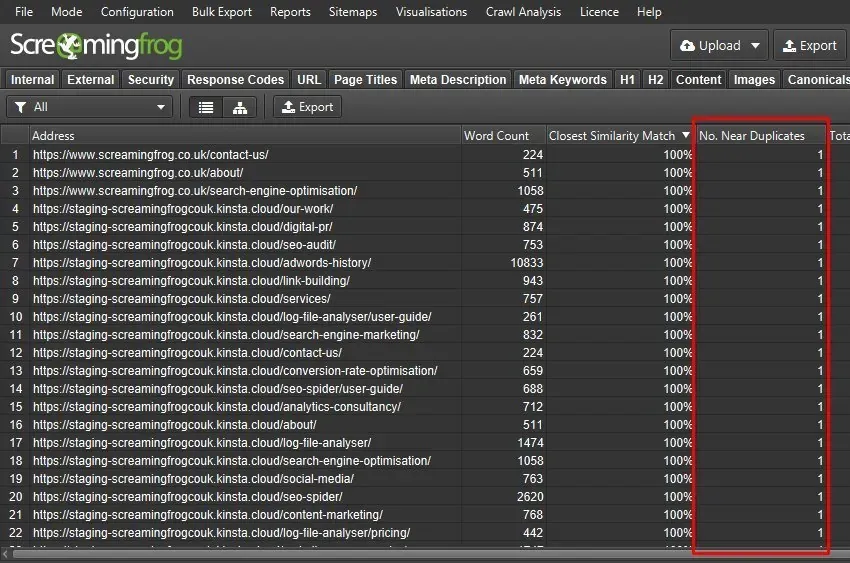
If the content matches perfectly, each URL will have 1 near duplicate with similarity close to 100%.
If the content has changed a lot, the similarity scores and number of near duplicates will differ. You can see which URLs match in SEO Spider’s bottom window.
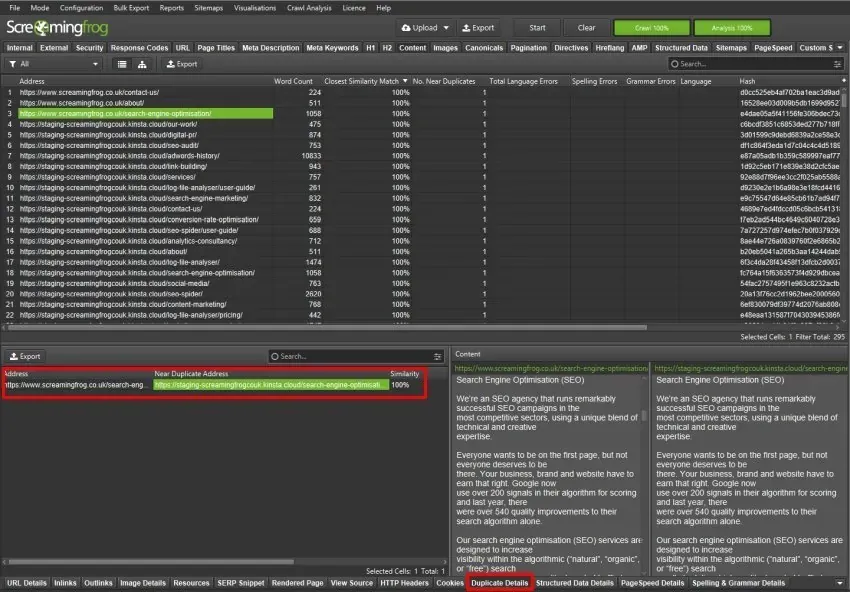
Now export the near duplicates for a good starting point to set up redirects and protect the site from the migration’s potential organic damage:
1Bulk Export›2Content›3Near Duplicates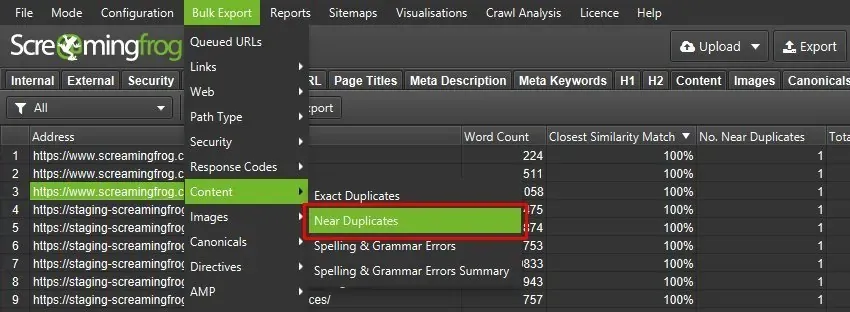
Post-migration
Crawl the new site
At launch, crawl the site to check that all pages can be crawled and indexed and that no important resource is blocked by robots.txt (1Response Codes›2Blocked by Robots.txt).
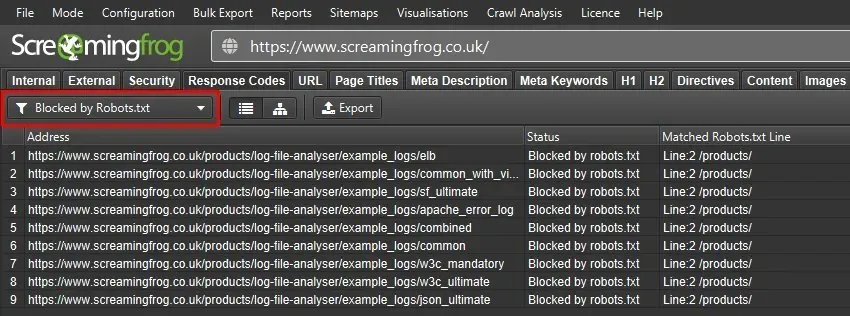
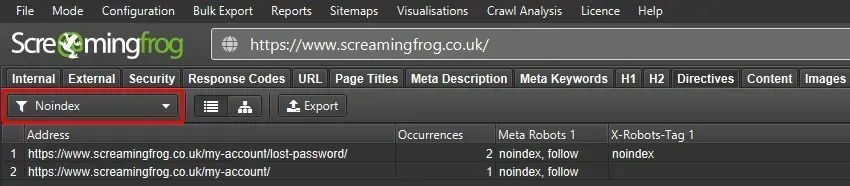
Make sure there are no unwanted noindex, nofollow or none directives in meta tags or the HTTP header (1Directives›2Noindex).
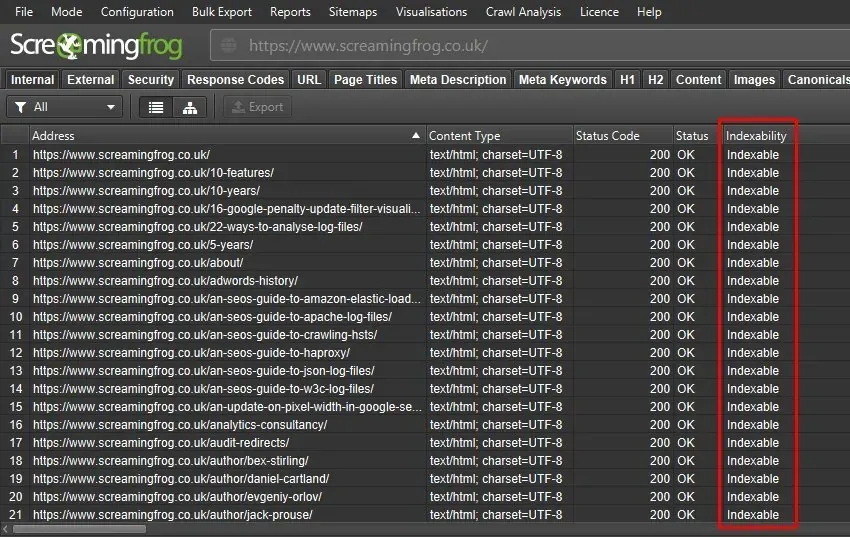
Check that every URL you want to rank is indexable.
Once these checks are done, I recommend comparing the old site with the live one to make sure everything you optimised on staging has made it online.
Check the redirects
If URLs have changed, it’s essential to check all 301 redirects to the new destinations, to avoid errors, chains, loops, temporary redirects or redirects to non-indexable pages.
Switch to List mode (1Mode›2List) and enable Always Follow Redirects in 1Configuration›2Spider›3Advanced.
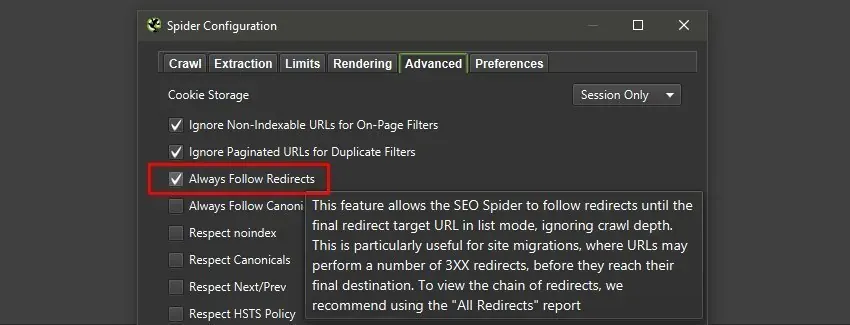
Upload the old URLs collected in the first crawl of the old site and start the crawl. At the end, export the All Redirects report:
1Reports›2Redirects›3All Redirects
All Redirects report
With this report you can assess:
- Chain Type: the type of redirect (HTTP, JavaScript, Meta Refresh).
- Number of Redirects: the number of hops in the chain.
- Redirect Loop: whether there are circular redirects (True/False).
- Temp Redirect in Chain: whether the chain includes a temporary redirect, such as a 302.
- Address: the starting URL.
- Final Address: the final destination.
- Indexability: whether the final destination is indexable. This is very useful to see whether, during the migration, you redirected an old URL to a page excluded from indexing: you use a redirect to pass trust to a new destination, but if that destination is “Non-Indexable” the work has no effect.
- Indexability Status: why the destination isn’t indexable, for example a noindex tag.
- Final Content: the destination’s content type (for example HTML).
- Final Status Code: the final destination’s status code (200, 4xx, 5xx or no response). This field is also essential so you don’t waste the redirect’s trust on a resource with errors. In short, if you don’t see a 200 status code, stop and fix it.
Google Analytics and GTM tracking
When a new site goes live, tracking scripts such as GA or GTM are often forgotten.
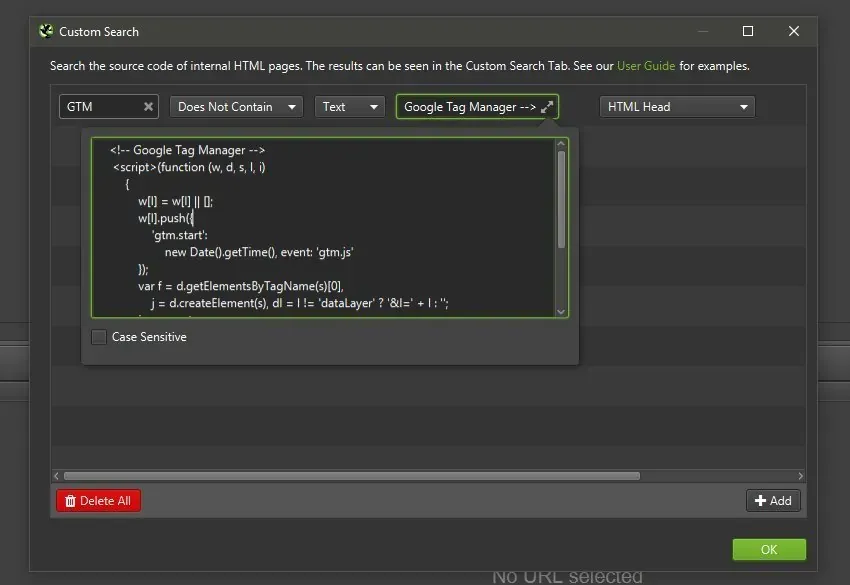
To check straight away that they’re in place, use Custom Search (1Configuration›2Custom›3Custom Search) with the Does Not Contain filter, searching for the full tracking snippet in the HTML head of every page.
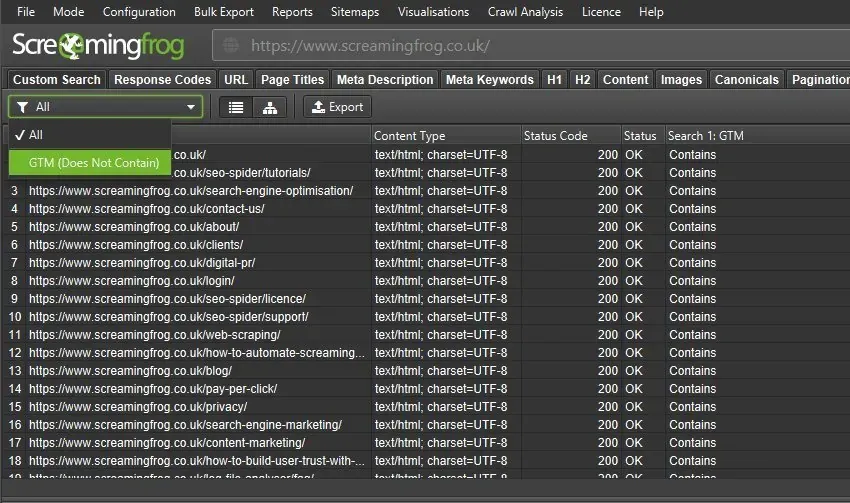
In the main window’s Custom Search tab you can see which URLs are missing tracking.
SEO migration video tutorial (in Italian)
Questions about SEO Migration?
These guides come from real projects. If something in your crawl doesn’t add up, or you want to apply this process to your site, get in touch.
 Author.Raffaele Visintin.Search & Strategic Marketing Advisor
